Thursday, July 28, 2011

IPhone Plush part 2

Alright so I left off with all my apps ready to be sewn onto the black fabric which will become the phone. And thats exactly what I did. This was actually really really hard! I had to be as precise as possible and try to keep all the apps as square as possible. Fleece can be stretchy, in some cases that was helpful and in other cases it was very irritating XD. I also added some other details (reception bar(triangle), battery, time, the little bottom button, and the apple logo on the back. So now all I have are two black rectangles of fabric with details on them. I face the black fabrics together so the details are touching(in the inside) and sew the black peices together, leaving a hole at the bottom.


Whenever I sew something with corners I like to snip the fabric to help it bend:

After that, I inside out the plushie through the hole I left. The plushie will look different like this than when it's stuffed, so unless you see some major problems with it, don't do any alterations or changes until after you stuff it. Often when stuffing I push the stuffing into the corners first, and then I fill from the farther parts toward the "stuffing" hole. I fill it till it seems the right amount of stuffing and then I massage the plush until it has the right shape. If it seems really lopsided or just has some problem areas that don't look right, unstuff the plush, and inside out it again and fix the areas that need fixing. Repeat the process till you have it right. Don't be afraid to unstitch some areas and redo them completely if need be. Also ignore all the stray polyfil that by now you've probably covered the plush with(I know I did and it shows so much on black XD ), you want to complete the design and stitch up the whole before you start cleaning that off.


I'm happy with how it looks so I'm going to stitch the hole. Honestly I have no idea if there is some special name for this stitch(there probably is) but since a lot of my sewing is self discovered, I just think of it as the invisible stitch. My invisible stitch is my preferred way to fill holes,but depending on the plush other ways can be better. As you can see in the picture to the right the hole has fabric that is folded inward. It is important to have your fabric doing this. I then check if I can pinch the fabric shut in a straight line. If not I adjust the folds till it is straight. Then I get my needle and thread and I start with the needle coming from the inside of the plush(to hide the thread's knot inside the plush) and I stitch like shown in the picture. I take a little from one side and then I weave to the other side and repeat until the whole is shut. I then weave my way back to start to better ensure that the stitching will not come apart.


Finally I clean off all the little polyfil strands and there you have it, an Iphone Plush!

Monday, July 25, 2011

IPhone Plush part 1

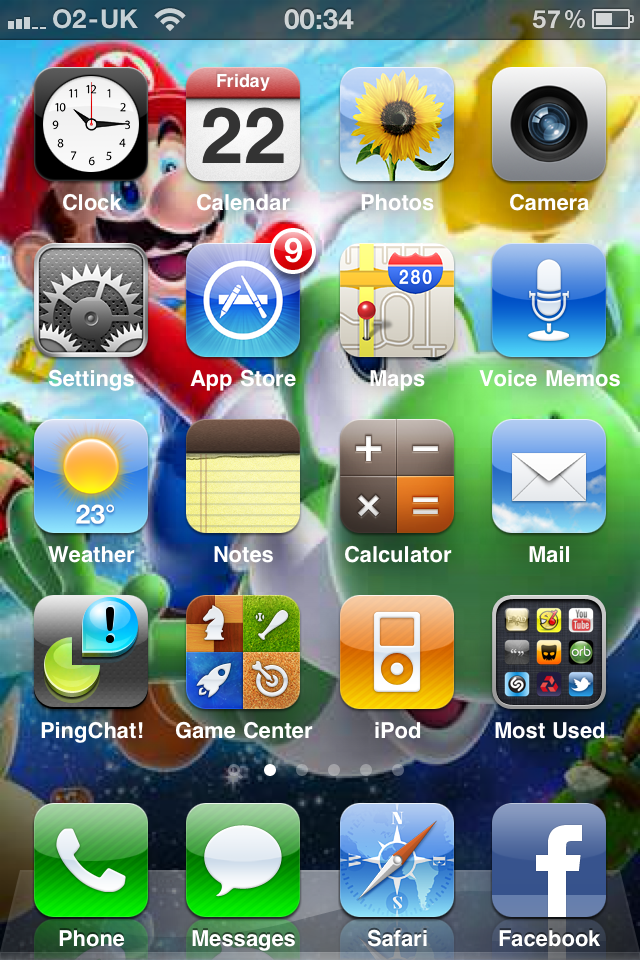
So it's about time I use this blog to share some sewing tips! :D  Today I'd like to share my latest project that I am working on: IPhone Plush!!  The idea is not my own, a friend of mine actually made  the custom order a couple days ago, giving me this picture of his iphone screen(to help me out with the apps since I have an andriod 4G evo phone). He wants the plush to be about twice as big and without the mario background.  And so with this custom order the challenge arises to make the iphone plush!


One of the first things I do before I make the plush is figure out everything I can and cannot do with sewing.  The first thing I noticed is that many of the apps on his phone are very complex with tiny details.  With little to no hand embroidery skills I knew some of those details would be impossible.  I also knew cutting fabric shapes that small would be risky and messy.  With those thoughts in mind I decided I could really only do about 12 of the apps.  And so I started constructing a paper model of what I wanted.  The paper model is such a helpful tool for me with detailed work.  It allows me to measure out everything, and visualize the plush before I even make it.  It also helps me determine how much fabric I will need and give consistency in my plushies should I make this plush again in the future.


With my paper outline ready I start cutting out fabric.  I use the little square piece to cut out the apps so they all end up roughly the same shape.  I always try my best to cut shapes the same, but sometimes they just don't come out that way.  So I always start big and leave room for me to trim if I need to adjust the shape at all.  I also keep a giant scrap bin of small pieces of fabric for occasions like this where i need very small pieces of fabric.  it allows me to waste less fabric :D
 With everything cut I like to lay it all out to see how it will all look. Notice how I marked the black fabric to give me guidelines of where everything should go.  These little marks help keep everything in the right position.


They look really good so far and I'm feeling happy with the way it is going.    So as you can see in the pictures, the plushes have lots of floating pieces.  My next move is to connect those peices to complete the apps.  This is one of those things I've learned through sewing.  You always do all these little details before you sew the big piece that they go on.  It makes everything so much easier.  

I added as many details as I felt comfortable with.  My personal favorite is the clock and the notepad. ^_^

This has been fun, if you have any questions feel free to comment. I hope to finish this up soon and share the rest next time I blog :D

Monday, July 4, 2011

New Blog

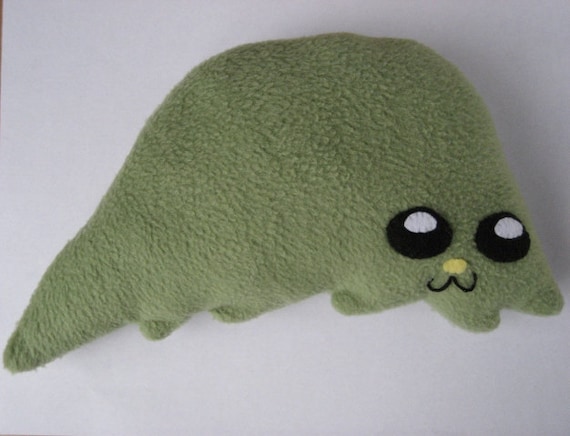
Sorta new to this blogging about crafts and plushies thing.  I'm hoping that this blog can be a way for me to show off my new plushies as well as share some tips and show you some glimpses inside my mind on how these little guys come to creation.  In addition to that it may be cool to occasionally feature other plush makers and have giveaways.  For now I'd just like to share my newest little guy, Mr Fuzzy Slug.

I actually really hate slugs they kinda gross me out cause they're so slimy(no offense to any slug lovers out there).  But one of the many goals I have when I make any of my Cute Stuffies is to make anything and everything cute.  And so this was my attempt at making a slug cute and I'm really happy with the outcome ^_^